On a mobile device? Click the little down arrow right of HOME to find all the great resources like event calendars and kids eat free! contact arizonafamilies@hotmail.com

Showing posts with label craft. Show all posts

Sunday, September 13, 2015

Amyabella Creations for Every Occasion

This post is sponsored and may contain affiliate links. Please see my disclosure policy HERE 

My youngest kiddo recently celebrated her birthday and she had to have a Star Wars theme. See the entire birthday post HERE. She likes both the path of the Jedi and the Dark Side. Depends on her mood. For her birthday outfit she opted for the Stormtrooper and outfit made by Amayabella Creations.


This outfit will take her on to Disneyland for our visit in the fall with the adorable ears!


As part of the party favors for the guests, we had hair bows made for all the girls. When they arrived for the party each girl was given one, so they could immediately clip them on. There was a nice mix of centers and designs.


Amayabella is based in Tucson but ships anywhere in the world. 
There are some great options for every theme and holiday.


See all of her fabulous designs through the following links:
Facebook: CLICK HERE 
Instagram:CLICK HERE 
Etsy:CLICK HERE


Star Wars Death Star Lip Balm #EOS #DIY #StarWars #DeathStar

This post may contain affiliate links.
Please see my disclosure policy HERE 


My children are lovers of all things Star Wars and my daughter recently had a birthday party with a theme from a galaxy far far away. See entire birthday post HERE. I am not sure that all 5-7 year -old girls are as crazy about the Death Star as my daughter is but I CAN say that most 5-7 year-old girls really seem to like EOS and similar round lip balms. We made these DIY lip balms as part of her gift bags.


The materials that we used:

  • EOS or similar round lip balm
  • Paint brushes
  • Grey multi-surface acrylic paints
  • White or silver paint pens
  • Matte finish spray


STEP 1:
Make a clean work space and spray your lip balms completely with the matte finish as a primer before painting. 
I did this step outside due to the fumes of the spray. 
It does dry quickly and then move on to step 2.

STEP 2:


Paint one half of each lip balm with gray paint. Let that dry completely before painting the other half. Do this carefully so that the gray color goes to the middle but allows for the lip balm to unscrew without paint covering the middle area. 
I let ours dry overnight.


STEP 3: 

Paint the other half with the gray paint and allow to dry completely. Again I let it dry overnight.

STEP 4:


Use the white or silver paint pens to create your Death Star designs. Make the circle in the indented finger grasp area of the lip balm. Spray again completely with the matte spray and allow to dry.


STEP 5:

Use your one of a kind Death Star themed lip balm as gifts or just for the Star Wars lover in your house.

Do you have any Star Wars themed DIY crafts or food you would like to share? put a pic or link in comments :)


A Birthday Blast at The Gaslight Theatre in Tucson


This post is sponsored and may contain affiliate links. Please see my disclosure policy HERE 
If you have been to The Gaslight Theatre before, you know that guest celebrations are sort of a big deal. After the main show,  the waitstaff and the cast announce birthdays, anniversaries and honor our military personnel.  We saw Space Wars, which was perfect for my daughter's Star Wars themed party. See entire birthday party theme post HERE.


We have been to enough Gaslight shows to know how fun it is when the guests names are called out and are brought a special ice cream cone to celebrate. This time my daughter was celebrating her birthday and we invited 6 of her friends to share the front row excitement with her! 


If you can book the front row, I highly recommend it, especially for the kids. There were high fives and interactive opportunities with the actors throughout the entire program. The kids laughed and laughed.  I cannot say we have ever had a more entertaining birthday party plus no big preparation or clean-up required.


Pizza, popcorn, and lemonade were our easy and fun snacks for the party and performance. The pizza from Grandma Tony's is always a hit and I just asked for a double cut so that the kiddos could  easily eat and enjoy the show. I did bring our own themed paper plates, and napkins.


The Gaslight office was so helpful from arranging the show and the seating to storing our presents and goody bags in the office. I highly recommend celebrating at the Gaslight Theatre in Tucson, your entire group will have a blast! See the information on current Gaslight programming HERE.


The Space Wars showtimes are over but we can't wait to see the upcoming Henry Porter and the Sorcerer's Secret although we do not have a special occasion to coincide with it this time, we have to see every show!


STAR WARS Birthday Party for My Daughter

This post is sponsored and may contain affiliate links. Please see my disclosure policy HERE 


My kids are OBSESSED with Star Wars. They school me on everything there is to know about it. I honestly am a bit clueless but have by proxy become more of a Star Wars fan than I ever thought I would be. My son and daughter role play like crazy and my daughter goes back and forth between Princess Leia and a Sith Lord. Her main reason for being Leia is because her favorite character out of all is Han Solo. Her backpack this year for first grade is Chewbaca and her Han Solo gun is another one of her most used toys.
At first, I thought she was just following in her older brother's footsteps and maybe she was - yet she now seems more the fan than even he is. When I asked her what she would like to do for her 6th birthday party, she said art and Star Wars. I found the perfect combination...theatre and Space Wars at the Gaslight Theatre!


The summer run of Space Wars at The Gaslight Theatre was such a hit! My daughter invited some of her best friends..and let her brother come along too.  The kids got the first row to see up close and personal the characters like "Yoga" and "Princess Leila". There were opportunities to interact with the characters and even give some high fives. The girl were laughing and booing emphatically at every scene. Read more about the upcoming shows at The Gaslight Theatre in Tucson HERE. Every show is so much fun for the entire family. See our Birthday party info HERE.
Since we were at The Gaslight Theatre, we were able to snack on popcorn and had their wonderful Grandma Tony's pizza. We shared pitchers of lemonade and the birthday girl got her special ice cream cone that they offer to people celebrating.


The only other treats we had were scrumptious cookies. They were made by Sweet Rush Boutique. Just like my daughter likes to use the force and show her dark side - her cookies were a mix of Princess Leia and Darth Vader.  They were so fun. Sweet Rush Boutique has done all of our birthday party treats for the past few years. All of them were delicious and adorable. See more information HERE.


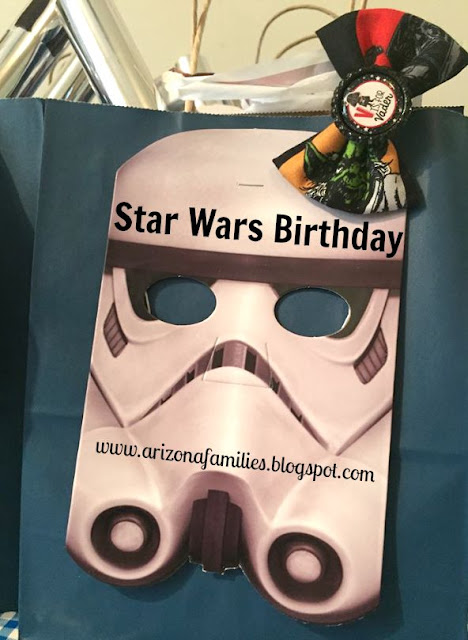
For the goody bags, we had the best bows for her to give to her friends. I clipped them on the outside of the bags and when the girls arrived at the theatre they were able to put them in their hair to wear during the show! Amayabella is a crafty creationist. I told her what I envisioned and in 2 days, she had them for us! In addition, Jennifer at Amaybella made a complete outfit with a stormtrooper theme. We will be heading to Disneyland in October, so the ears with the outfit are such a great addition. To see more of Amayabella's designs and to order outfits, custom or ready-made bows go HERE.

In the goody bags, we also had some fun DIY light-up lightsabers and DIY Death Star lip balms. To see how to make the sabers go HERE and to see lip balms go HERE.


This birthday was out of this world and I know that both of my kids are already dreaming about to having another Star Wars themed party!


DIY Lightsabers #StarWars

This post may contain affiliate links. Please see my disclosure policy HERE 


A very simple way to make a fun lightsaber for a party or event is to use glow sticks. We used the thicker styrofoam glow stick for my daughter's recent Star Wars themed birthday party- read about the entire party ---> HERE.

The lightsabers will light up as long as the glow stick lasts. 

Materials needed:

  • Glow Stick- we prefer the thicker and longer ones
  • Silver tape
  • Black marker
  • Silver nail polish 

STEP 1:

Carefully remove the glow stick from the package to make sure that you do not ignite the glow stick. 


STEP 2: 


Add strips of silver tape as you would like at one end of the glow stick. I used 2 strips and then my kids asked to make some a bit differently to look like different Star Wars characters hilts.

STEP 3:

Use the black marker to decorate the silver tape. My kids did all of this step!

STEP 4:

Paint the end of the hilt with silver nail polish.

STEP 5:

PLAY!


Wednesday, December 22, 2010

Interested in Crafts?

I see that a lot of our readers like to look at some of the crafts that I have posted.  I have started a different blog that is strictly my crafting adventures.  It's amazing all of the creative people out there in the blogosphere.  I have gotten so many great ideas this holiday.  You can see my crafts and some of the creative people on my link up parties.  I am still in the process of adding all of my favorites.


Check it out HERE.

I will still continue to post my family friendly crafts and store them under my family crafts tab at the top of our page.


Friday, November 19, 2010

Gift Idea for teachers + Restaraunt.com deal


Restaurant.com Weekly Promo Offer 468 x 60


Get 80% off Restaurant.com $25 Gift Certificates! Use code GOBBLE at checkout now through 11/25/10.

That's a $25 gift Certificate for $2!  It's a great addition to any gift you are giving this year.  It would be really cut to make a to/from gift tag that you fold the gift certificate into!

~~~~~~~~~~~~~~~~~~~~~~~~~~~~~~~~~~~~~~~~~~~~~~~~~~

Gift Tag Project:


Cut out two circles that are the same size and that will fit a gift certificate when you fold it into a square or recangle.


Glue along the edges in a U-shape to leave an opening at the top. After glue dries, insert folded certificate.


Cut out two small rectangles for the top of the Ornament gift tag.  Hole punch at the top and use decorative zig-zag scissors for the bottom.


Glue the topper to the top of the ornament on both sides.  Tie a string to the onament and write to/from on the tag.  Add this to any gift you are giving this year as an extra special gift!


~~~~~~~~~~~~~~~~~~~~~~~~~~~~~~~~~~~~~~~~~~~

Another idea for this same ornament is to use it for teachers gifts, this is what I plan to do for my kids teachers. Here is a picture of a similar idea:

We will be using a Rosemary Christmas tree and decorating it with these Ornaments filled with $5 gift cards.

Step 1: Write a letter to the teacher to find out her likes and favorite stores. 

Step 2: Write a letter to the parents to ask them to send in $6.  I have this as a document if anyone is interested, just email me. 

The money will go towards buying a $5 gift card for their child and the extra $1 will go towards buying a Rosemary Christmas tree that retails for $10 at the major Hardware stores. 

Step 3: Have the students decorate their ornaments and write their names on the back. You can ask the art teacher and volunteer that day or you can pull kids out of the class room 4 at a time to decorate them (with permission from the teacher of course)  I am having the kids do marble painting over the ornaments (before the yellow topper is added) with green, white, red paint.  (egg carton with paint,marbles in each tray, use spoon to scoop marble out and place in a box top where the ornament is laying flat.  Have the kids roll marbles over the ornament)

Step 4: (optional) On the morning of the last day before break bring the tree into the class and have the teacher sit at the table, have the kids line up outside class door and hand each child their ornament.  Have the kids come in and decorate the tree one by one and say "Merry Christmas" to the teacher. 

Note: the trees are kind of small, so I made 8 ornaments and the rest are rectangular shaped to resemble presents, these get laid at the bottom of the tree.

What a great teacher present, huh?  My son has 15 kids in his class, so that makes $75 worth of gift cards to his teachers favorite stores!  That is a gift that is not only special because the kids helped make it, but usable!

I will repost a picture when I we get the tree completed for the teachers.